RECIPES AT THE END OF POST!
Hot Weather = Limited Choices
Camping in Singapore poses some rather unique problems that the average North American would not be accustomed to. The first thing that comes to mind is the ever present and oppressive heat and humidity. Singapore is 1 degree north of the equator in a tropical rainforest climate. The average temperature is around 30 degrees Celsius and the average humidity is about 80%.
There are no real ‘seasons’ like in the North American sense but the weather in Singapore can be broken up into two monsoons – the Northeast and Southwests monsoon. During this time, frequent afternoon thundershowers will soak the country. In a nutshell: Singapore is humid, hot and wet. Or, as my friend suggests, hot, hotter and hottest.

This hot climate is also terrible news for the camping foodie. Anything fresh is pretty much a goner after the first few days. Additionally, with Singapore being a country comprised of several religions, other ‘normal’ camp foods are also prohibited. Anything with pork or otherwise isn’t Halal can’t be used out of respect for our Muslim students and teachers. My friend is also Buddhist so anything beef is also a no-no. In a nutshell, no perishable items, no pork, no beef. You now must be wondering, exactly what do we eat out there, then?

Backpacking Meals for the Tropics
Here’s what I tell my students:
- Use a stove – depending on the season, dry firewood is hard to find.
- Avoid anything leafy. They will wilt after an hour and become slimey.
- SOME perishables are OK – we’ve brought hardy root vegetables like potatoes, carrots onion. But they’re heavy. Otherwise, whatever fresh veg you bring, plan on eating it on the first day.
- Very dry cured meat is OK, but generally isn’t Halal. (Think dried Chinese sausages, pork belly and cured duck legs.)
- Canned items are obviously OK but very heavy.
- Dehydrated items are best. (But we don’t have a dehydrator 😦 )
- Proper portioning will prevent you from bringing too much food or, worse, starving on a backpacking trip. Example, 1 cup of rice will feed 2 people. A bunch of pasta that you can wrap your thumb and forefinger around, touching the crease of the first knuckle, will feed one hungry person. And if in doubt, imagine the size of your stomach, which is approximately the size of your fist.
- Staple food items hold up very well – flour, rice, pasta. But be very careful about extra moisture getting trapped and causing mold, especially during the rainy season.

Some examples from our very own student-chefs:
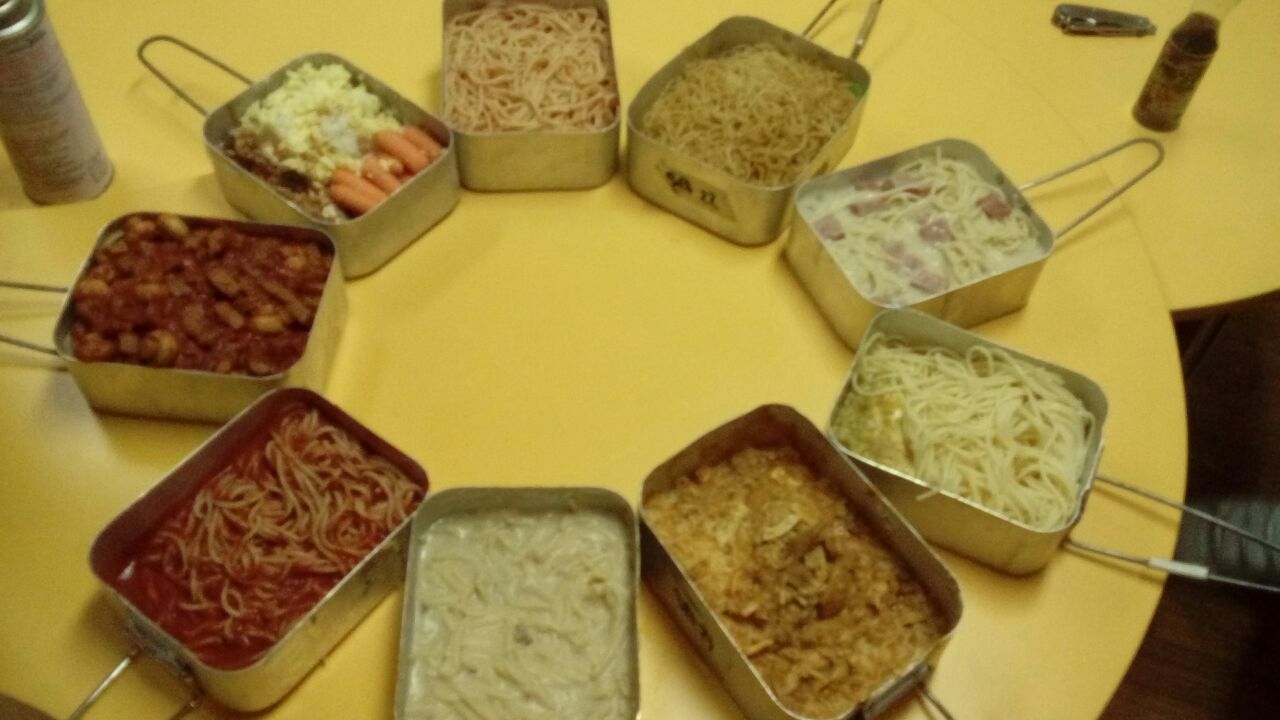
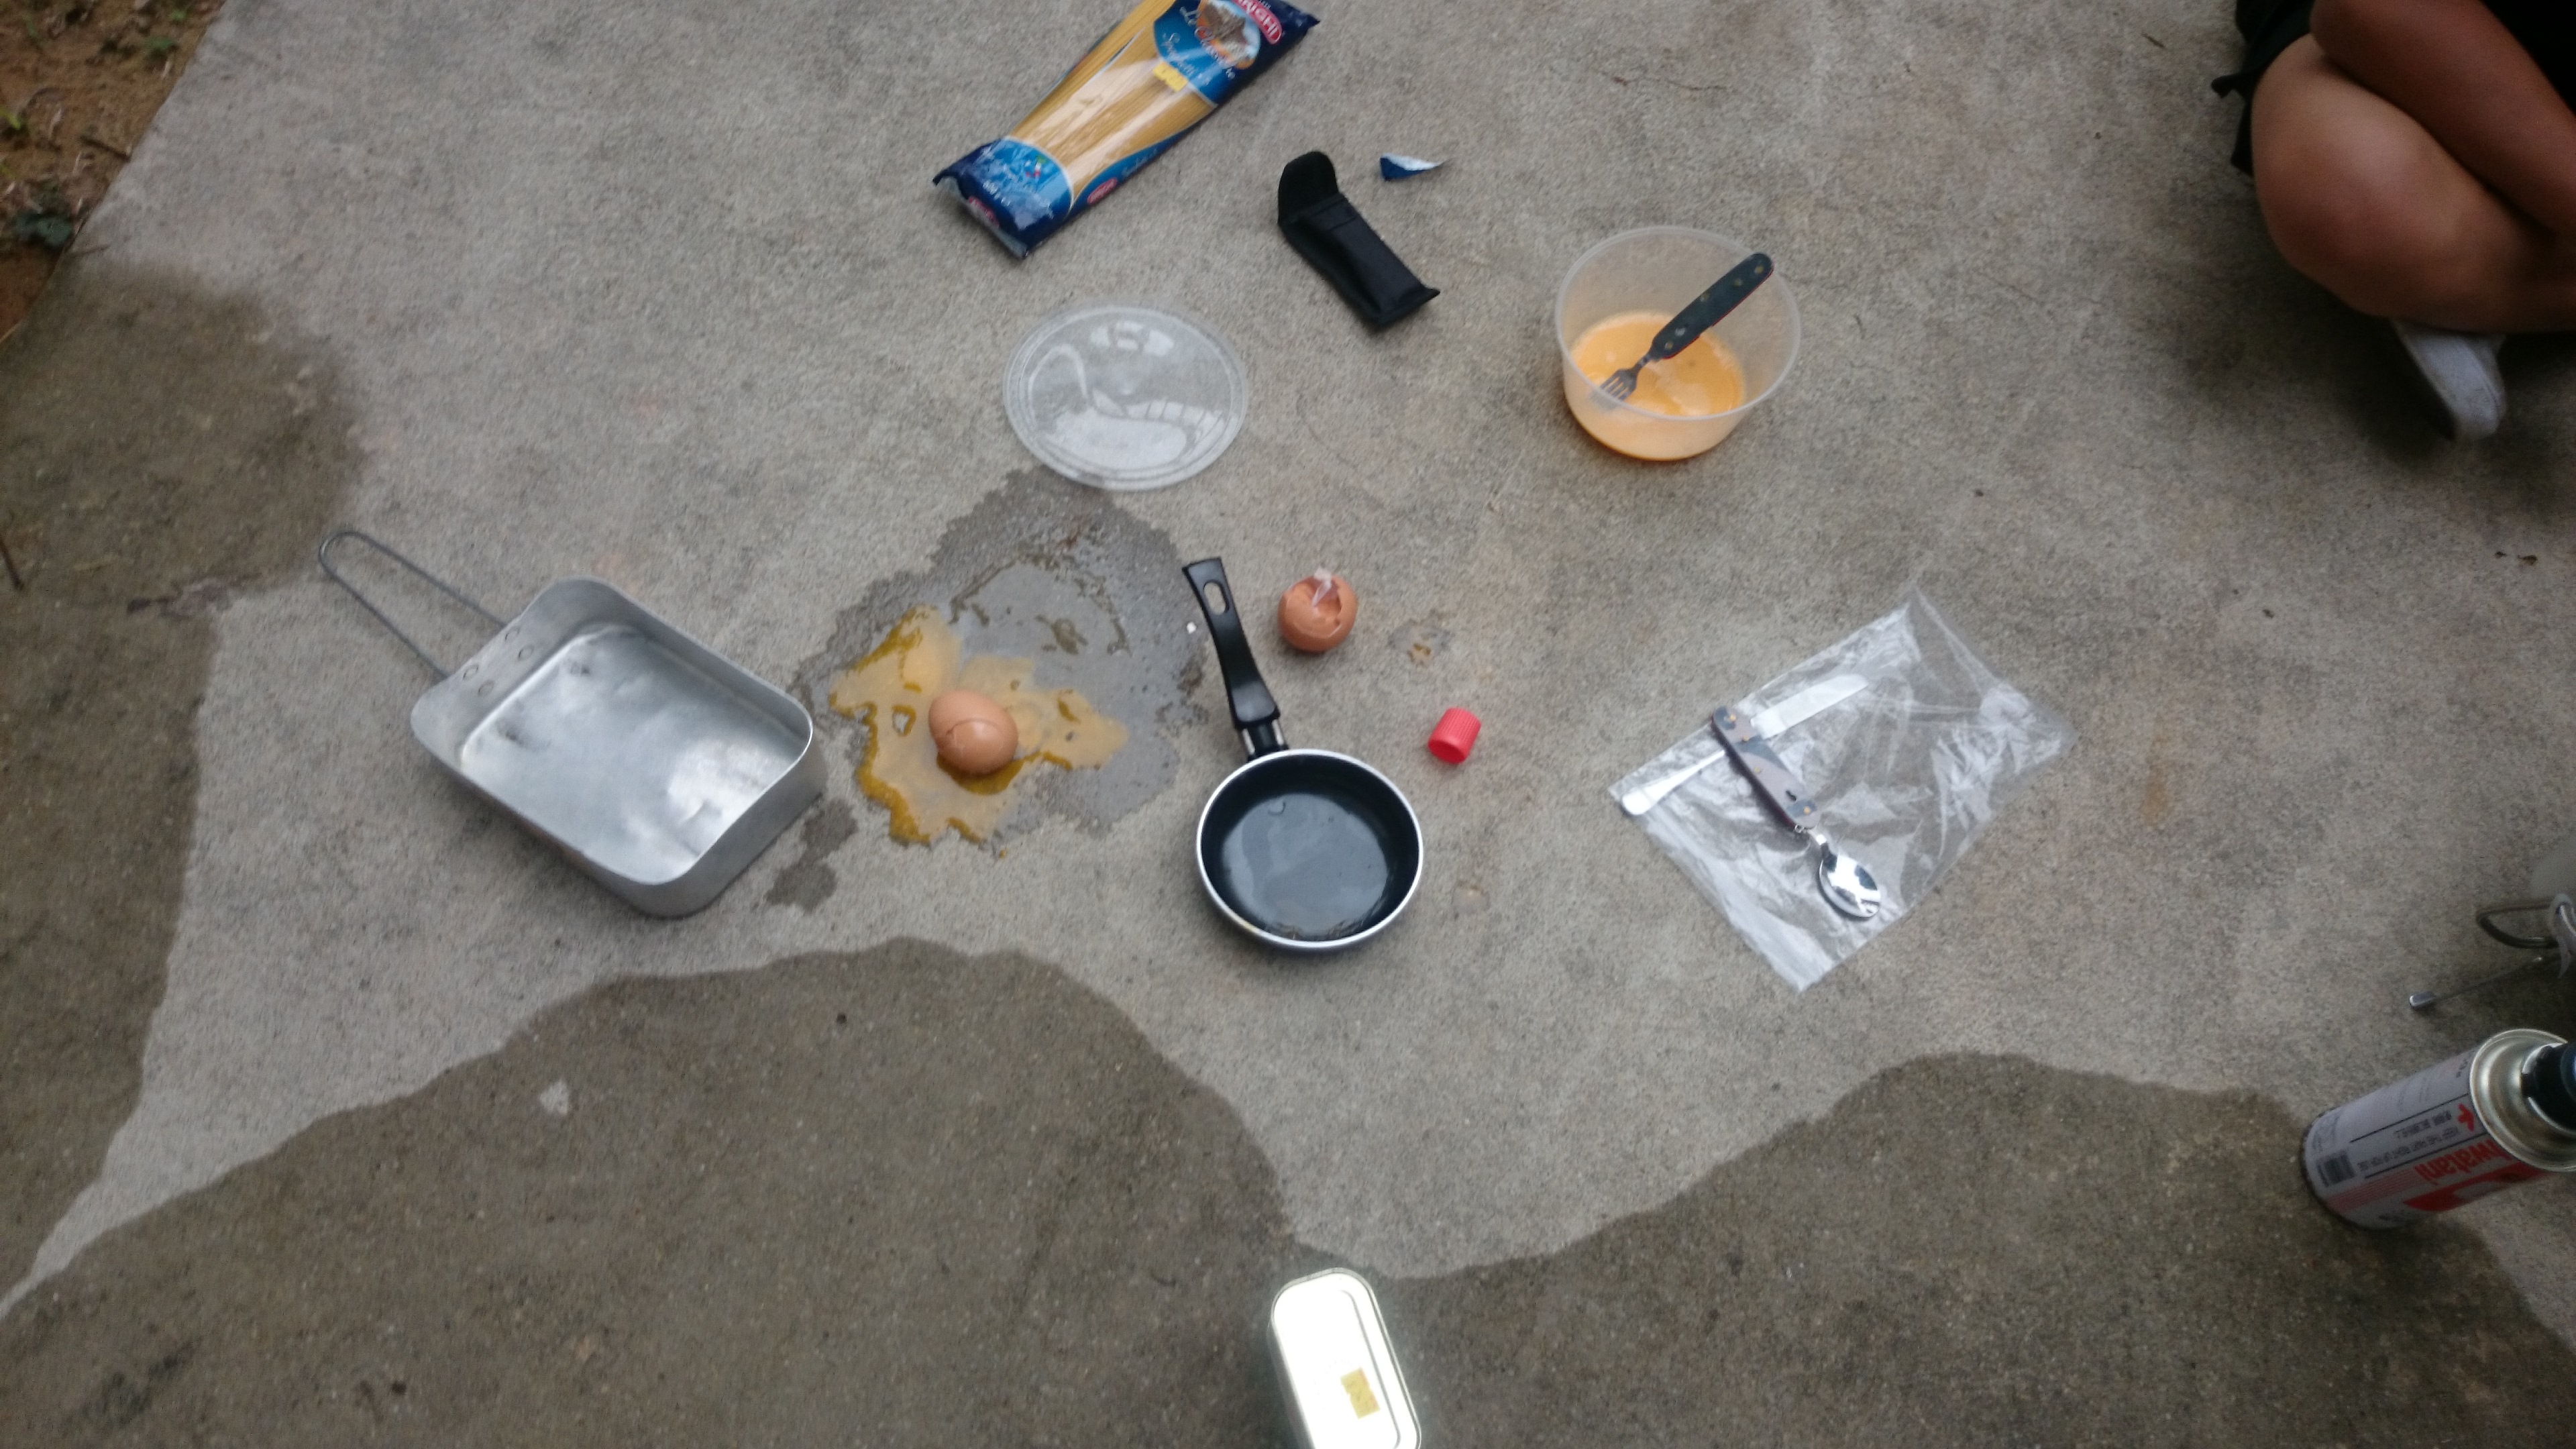


The kids ended up with a lot of pasta, which is fine. Students like the simplicity of spaghetti and it’s a good starting point for the novice camp cook. As they get more adventurous, kids will venture into more complicated recipes and ingredients. Two girls managed to successfully cook rice in a mess tin (Left), which is no easy feat, as rice tends to stick to the bottom and burn. From a teacher’s perspective, really interesting teachable moments pop up. Mostly because your average student these days really don’t have a lot of experience in the kitchen. You know those luncheon meat tins that come with a key that you twist a strip of metal off the tin with? They have no clue. The uninformed duo in my class took a can opener to the luncheon meat!

Recipes
Below, I have recipes for two consistent recipes that I’ve found to work well with warm weather camp cooking:
- Potato Chapatis
- Curry (Vegetarian or fish)
Potato Chapatis
Ingredients:
2 cups flour
Pinch of salt
Water (approx. 1 cup)
1/4 cup Vegetable oil
1/4 extra flour
Filling (optional):
3 medium potatoes
1 teaspoon Cumin seeds, toasted
Pinch of salt
For the filling, boil the potatoes until soft enough to mash. You may remove the skin for mashing or not, I personally like without the skin. Mix in the cumin seeds and salt and set aside.
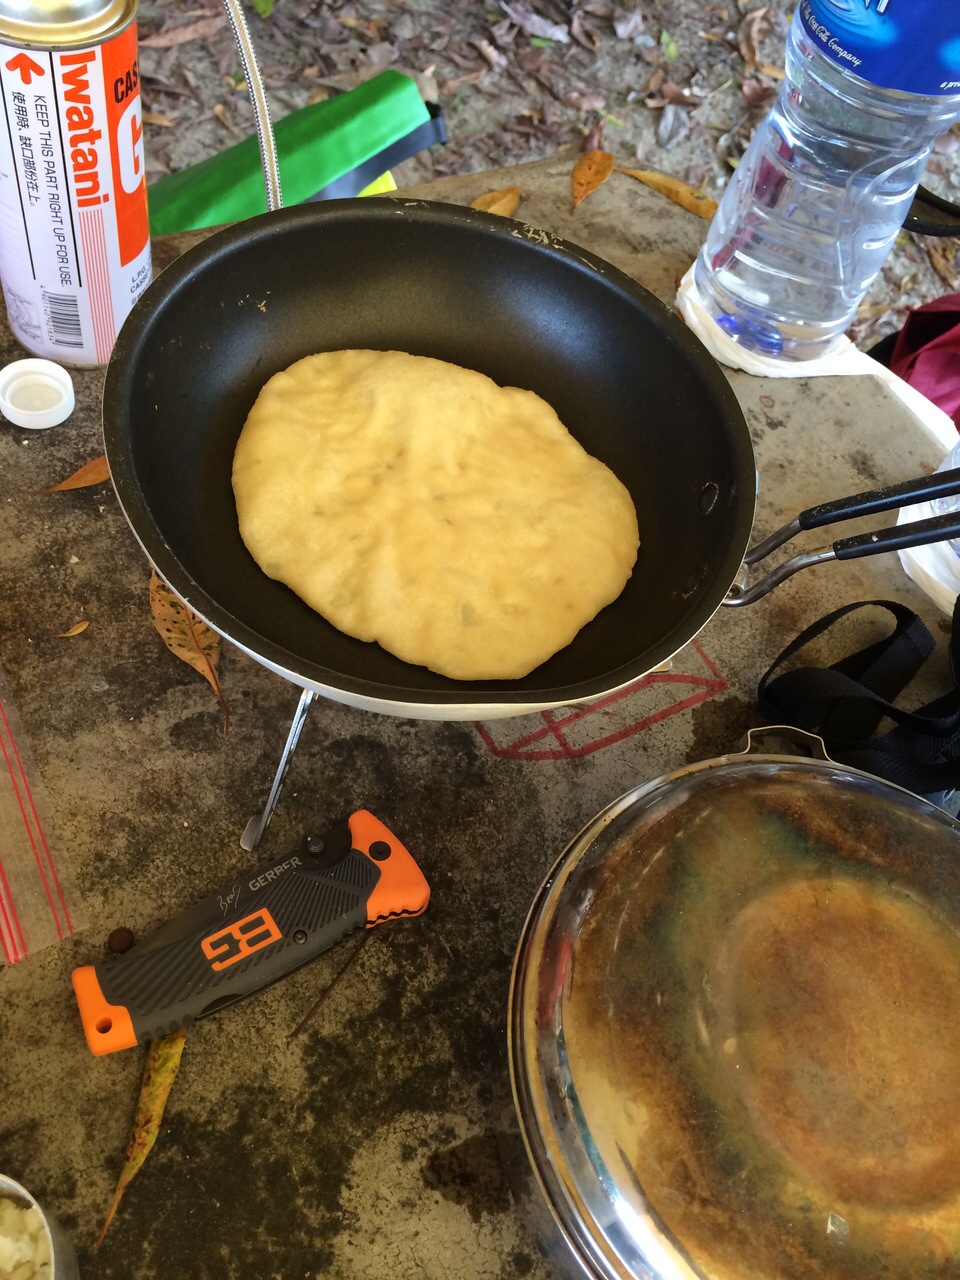
Mix the flour, salt and water until a soft, malleable dough forms. Knead for 5mins or until the dough is shiny, smooth and bounces back when you poke it with your finger. It should be stiffer than your after average bread dough but still be able to fold into a smooth ball. Set aside for around 20mins or until the dough relaxes.
After the wait, divide up the dough into golf ball-sized pieces. Roll the ball out until it is only about 1/3 cm thick. Brush liberally with oil and sprinkle with flour. Fold in half. Repeat the oiling and sprinkling of flour and fold in half again. You should end up with a small wedge. Roll the wedge in all directions until it becomes a circle again, 1/3 – 1/2 cm thick. Technically, you don’t have to fold it this way but proper chapatis are made like to give it layers. If you have a campfire and a very hot cast iron pan, nice thick pieces of 1cm heat up real fluffy and nice because of the oven-like environment.
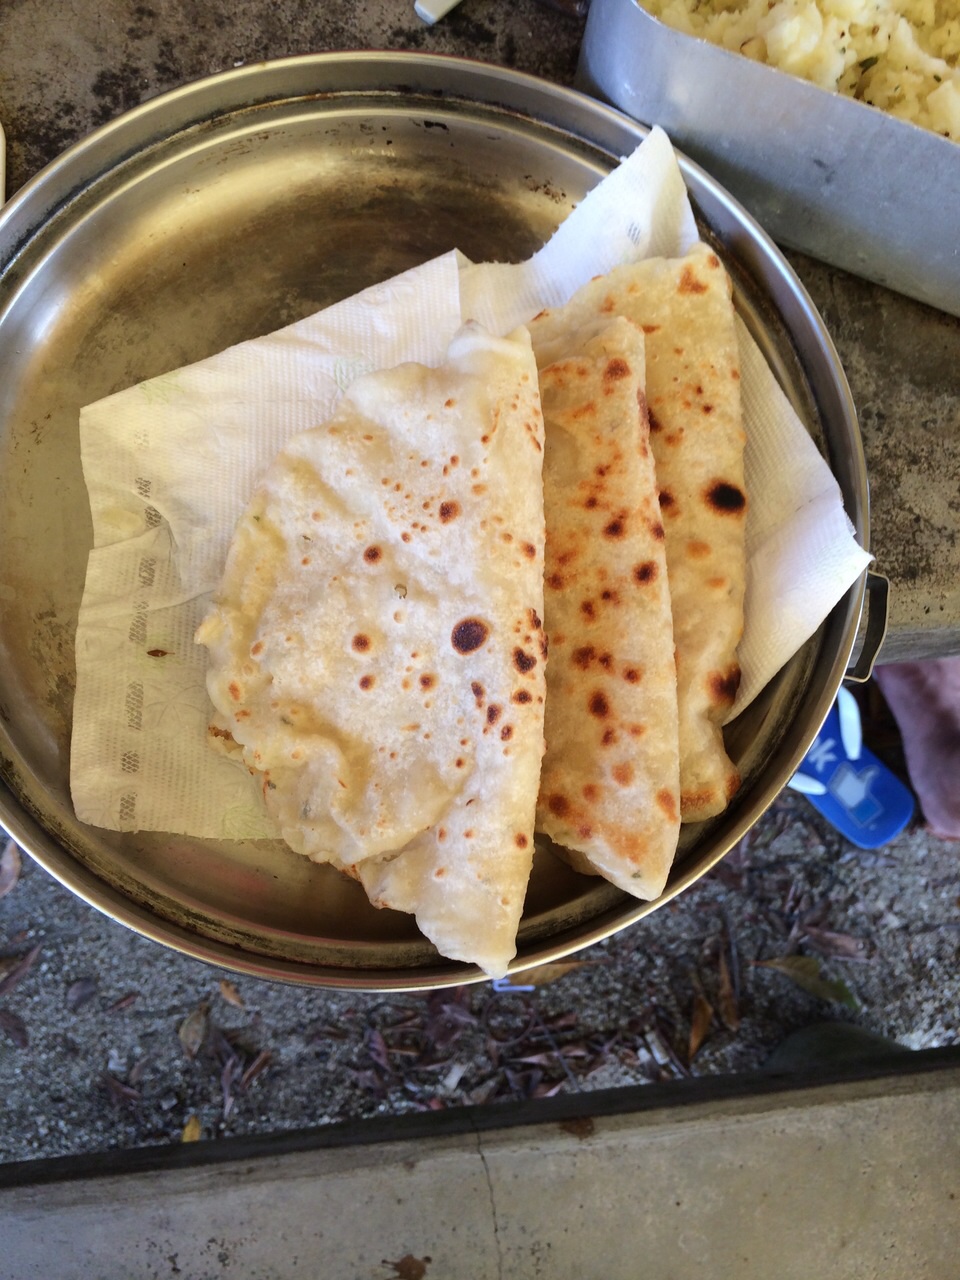
Heat up a pan until it’s quite hot (or nice clean flat rock, or cast iron pan … heck, I dare you to try it on a stick!), add a drizzle of oil and slap on the chapati. Heat for approximately 1min and repeat on the other side. Each side should have golden brown spots. Remove from the hot pan and lightly clasp it in half and onto a waiting plate. Repeat until finished. The recipe should make about 8 pieces.
Just for reference, I can eat 4 to myself. The beauty of this simple bread recipe is that there is no yeast involved and therefore, no proofing time needed. I usually use my Nalgene as a rolling pin. Up to you.

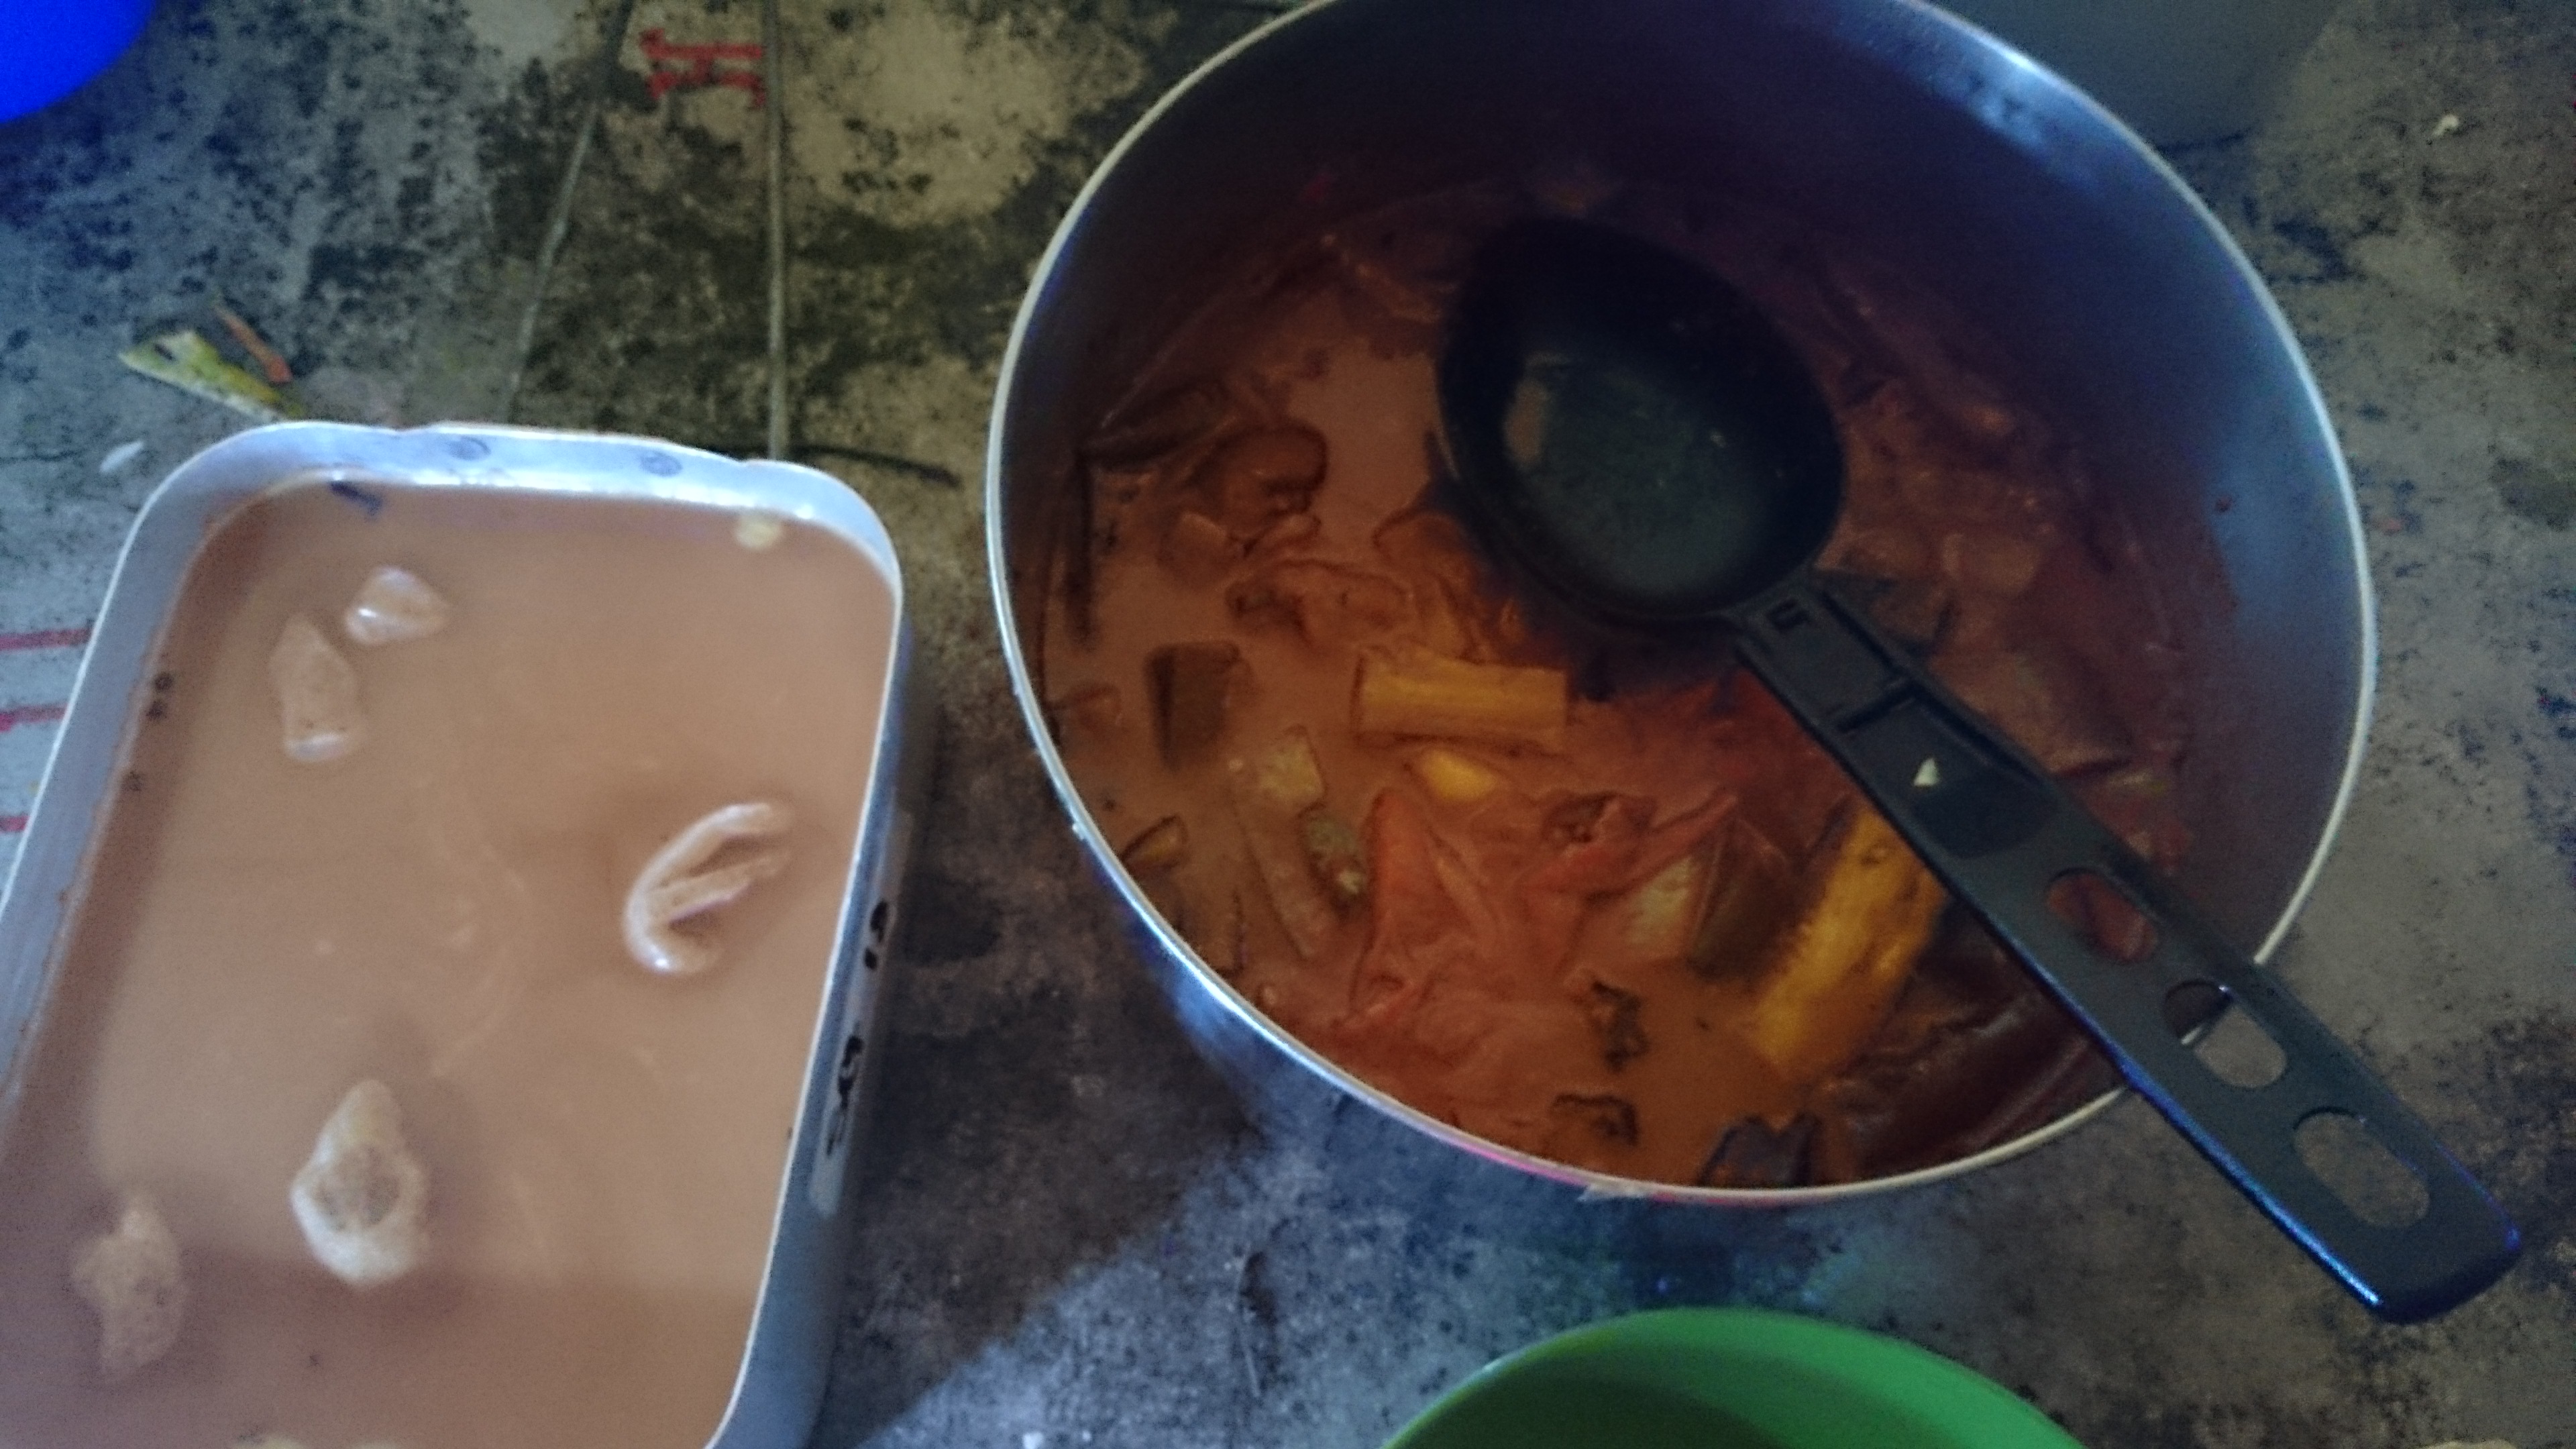
Curry
Ingredients:
1 medium onion, diced until tiny
A handful of okra, sliced
1 small eggplant, diced into 3-4cm cubes preferably
1 carrot, diced not-too-big compared to the other stuff as it takes longer to cook
1 medium potato, diced
1 tomato, quartered
2 cloves of garlic, minced
4 heaping tablespoons of curry powder
Vegetable oil
Curry leaves (optional)
Red chilli pepper (optional)
Salt to taste
Can of tomato sardines (optional)
Super easy: have enough vegetable oil to cover the bottom of the pot. Be generous, a proper curry will have the oil float to the top and you can scoop of off later. Toss in the onion and curry powder. Fry until fragrant and the onion is soft, approx. 3mins. Toss in garlic and curry leaves, if you’re using them, and fry for a minute. Throw in EVERYTHING else. Add water to ALMOST cover the contents. Simmer until curry is thick. This takes approximately 30mins depending on if you’re using a campfire or stove. Serve with chapatis or bread or rice or, if you’re into that sort of thing, pasta as well.
Bon appetit!
-J

This is great, thank you!
LikeLike